- Print
- DarkLight
Article summary
Did you find this summary helpful?
Thank you for your feedback!
Overview
The system is designed around catalogs and templates for project, sites, milestones, and tasks.
The template is for large solar projects either ground mount or rooftop & their related sites is already set up in the system and can easily be modified as necessary.
New templates can be added to the system. For additional project types such as carport projects or for “placeholder” projects required for long term financial projections.
Adding a new Template Project/Site
Step 1, open the PROJECTS tab (1) and click the NEW PROJECT button (2).

Step 2, Add the new project template name (1) and choose a project type related to an already prepopulated template that is similar to the one being set up (2).

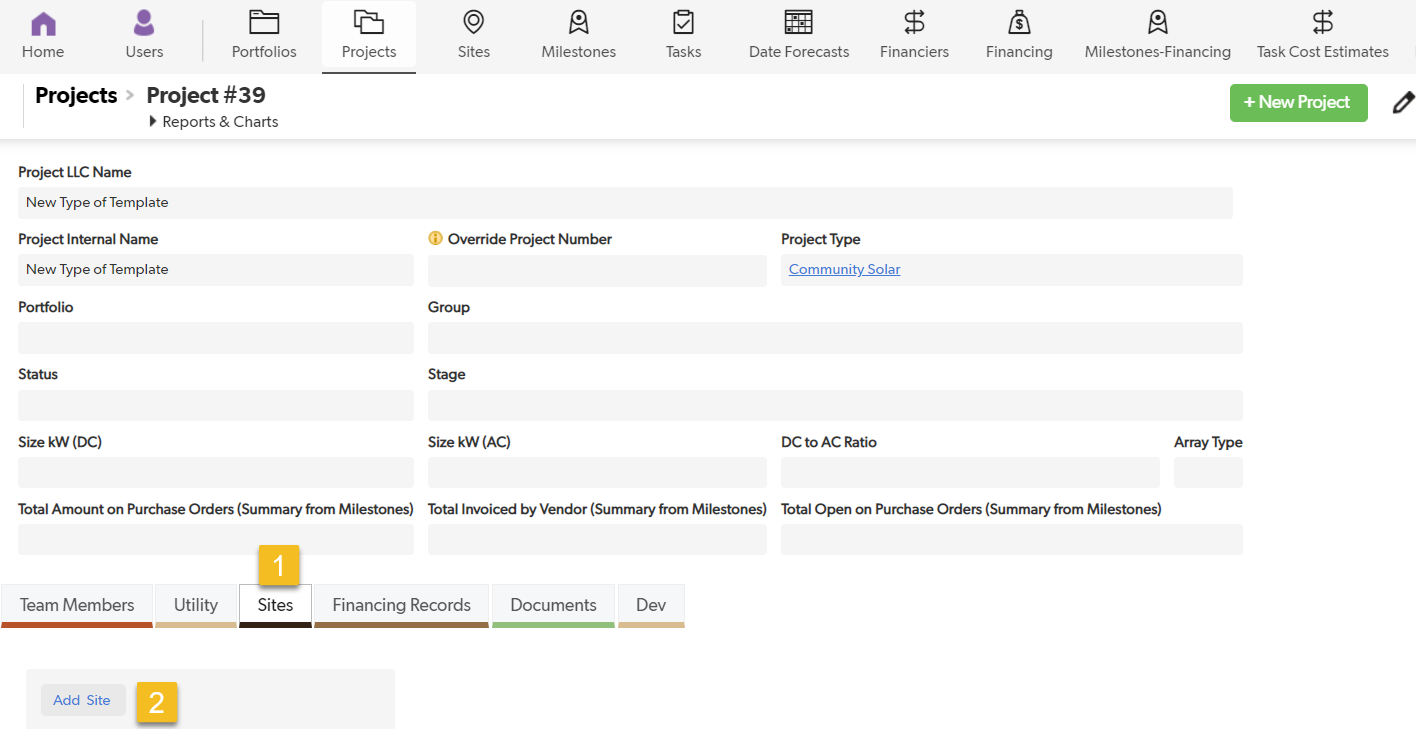
Step 3, from the project view click on the SITES tab (1). Open the ADD SITE tab (2).

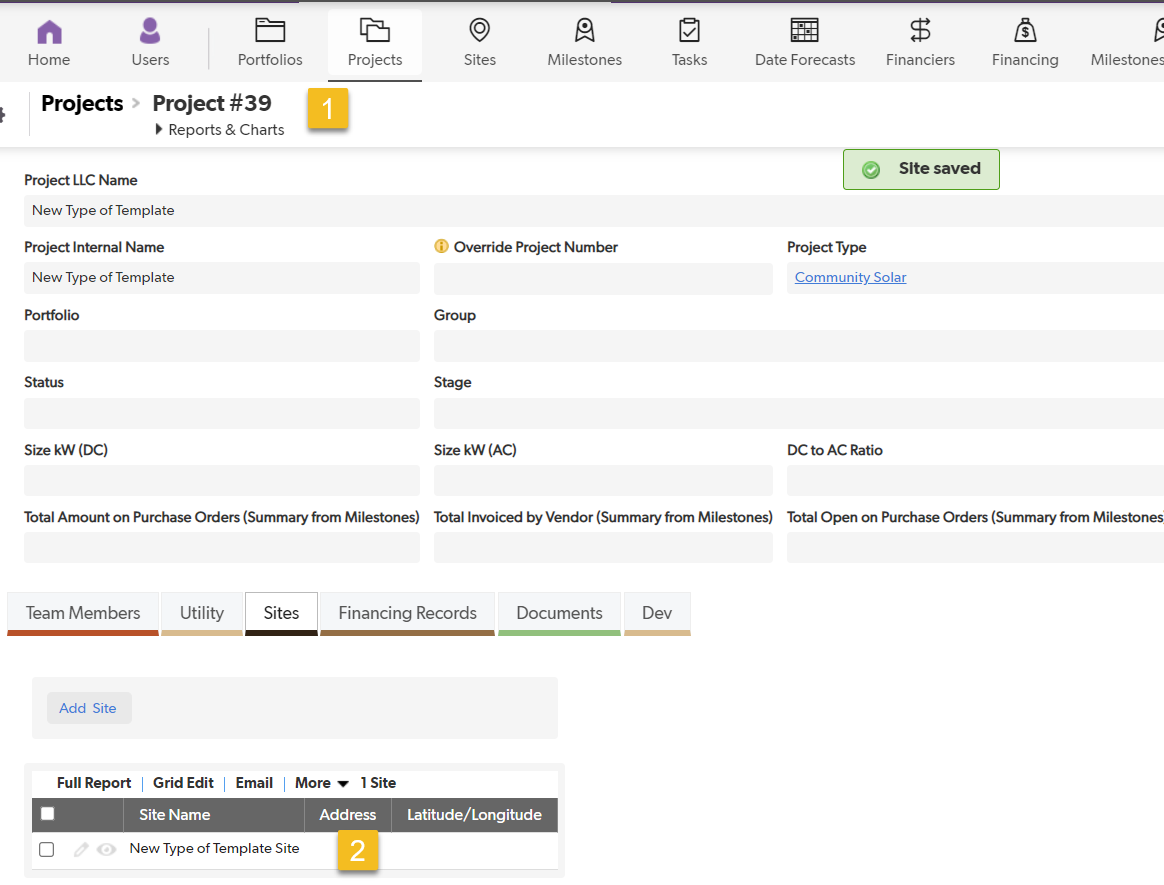
Step 4, add the new Template Site name (1) then save and close (2).

Step 5, from the project view (1), edit the new Template Site (2).

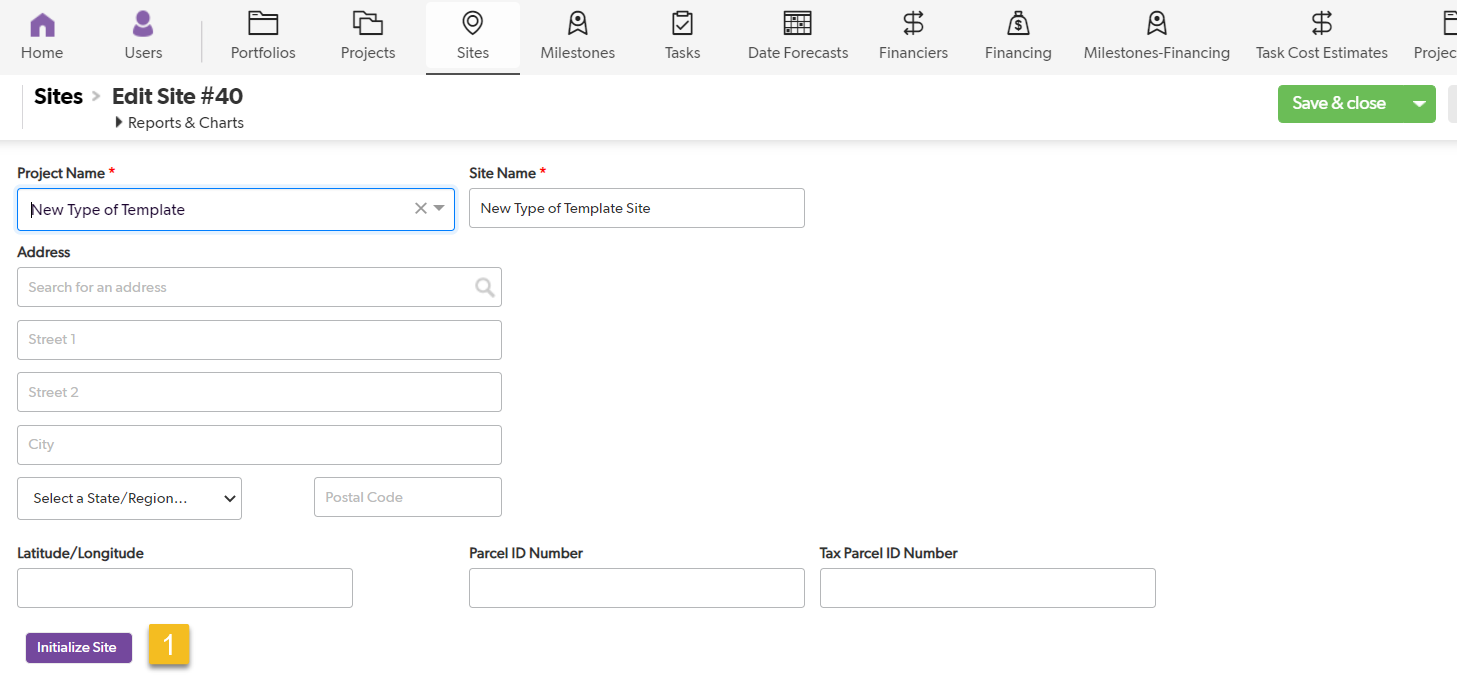
Step 6, from the edit site view, click INITIALIZE SITE (1). This action will bring in the Milestones, Task, Durations, Predecessors and Cost Estimates from the similar Site template. When this screen is saved, the INITIATE SITE button will no longer be available.

Step 7, from the PROJECTS Tab (1), open the new Project Template (2).

Step 8, from the project view (1), go to the Project Type drop down (2). Click on Create a new project type.

Step 9, type in a name for new project type (1) and from the drop down find the New Project Template that was just set up (2). Go back to the project and save and close.

Step 10, check the PROJECT TYPES tab (1) to make sure the new type is there and a number is in the related project template and the related site template sections.

Remember, all of this information can be deleted or changed at any time.
Was this article helpful?
.png)

